Updating pages
Covering l aspects of how to go about updating pages
After the page has been added as described in Step 1 – “Adding a Page” the pages can be modified as described below. Images can be added as described in “Adding images to the web page” before or after adding additional text. It is preferable to avoid trying to embed images in the page using the HTML editor.
Step 4 – Add details and using the HTML Editor
The light blue button at the bottom of the “add a page” screen takes us to the second screen to add more information in the lower part of the page as it is viewed in a browser. However, you can skip this and go to either step 3 – “Add a main picture” or Step 5 – “Display options” as appropriate for the effect you wish to achieve.
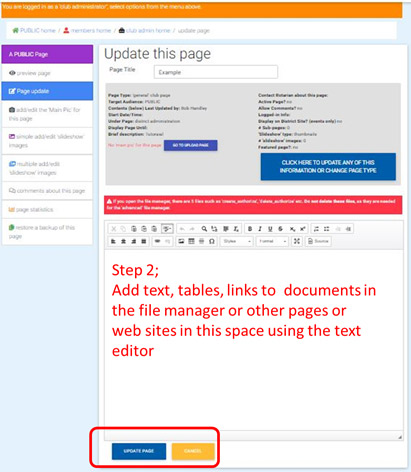
Image Adding New pages 4-1 – Second page for adding information to the page
The large area is for the body of the page where you can copy/paste information from another source, upload files and pictures. Word text usually has Microsoft formatting code embedded in it which can mess up the format of the page on your website. If you use Word then its good practice to copy the text into Notepad first and then copy from there into the template, adding formatting as required in the Template. The use and selection of the text editor is covered in the relevant tutorial. [LINK]
As with the rest of the template, you can update and change things easily - so don't worry about trying to do everything in one go.
Again, nothing is saved/changed until the blue “Update Page” button is clicked. If doing something complex, then remember to save about every 15 minutes to ensure that the page does not “time out”
Step 5 – Display and Feedback Options
Having completed the page to your satisfaction there are additional options to be selected. Return to “Page update” and click on the blue button to update the information in the upper area of the page
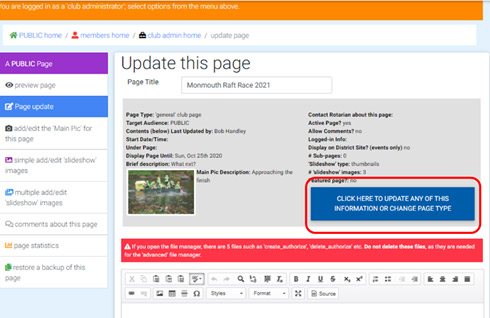
Image Adding New pages 4-2 – Update Page information
This opens a page on which the initial information about the page, to relate the page to another page to make into a featured page or change the contact information can be changed.
As well as information previously added when the page was set up there are new options available determining how the page is presented. Working down from the top of the image below there are the following:
“Under page” – If you want the page to appear in the “what we do” menu list on the home page etc do not put it “under” any other page, however, it may be useful to have it related to a “top level” page and appear as a related page – for example a school event may related to a Page about the Club’s broader “Work with schools” Once a main page has been established then subpages can be added, either as event pages and/or for additional information.
“Allow Comments” – tick the 'allow comments' = 'yes' button. A comments form will be displayed on the page. Visitors to the site can then add a comment which once approved by the club administrator is then displayed, with other comments, on the page
“Change Page type” – If necessary, the page type can be changed, or change the target audience between “members only” or “public”
“Contact Rotarian” – A Rotarian can be identified as the main contact for the page – if this person is identified at the bottom of the page a link will be inserted with the Rotarian’s name, which when clicked opens an area to send a message to the Rotarian
At the bottom of the page are two important options
“Make this a featured page” and “Slideshow type” A “featured page” will appear on your homepage either as a “thumbnail” or as a “carousel” picture depending on the homepage option selected. The Images in this page will be displayed as either a “carousel” or “thumbnail” depending on the selected option.
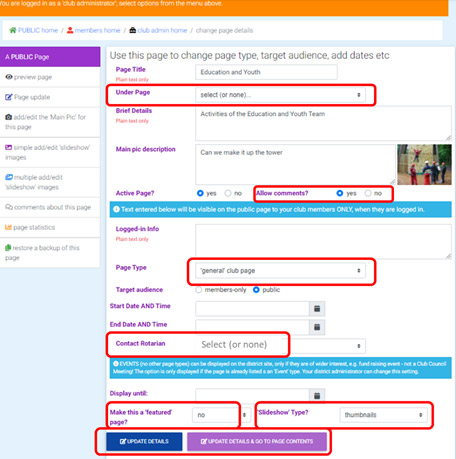
Image Adding New pages 4-3 – Edit Page details
Written by Bob Handley